Category: Step By Step

How to do Contracts

There are a lot of different ways schools can handle contracts & contract payments. MasterVision gives you some different options on how you can track all of that. Before we can get into that, we need to define a couple terms – Billing Company contracts and In House contracts.

Billing Company: MasterVision calls ny contract that has payments being collected by someone else a “Billing Company” contract. This might be an actual billing company like EFC or Member Solutions, but it could also be that your bank is collecting EFT/ACH payments or any other setup where the money is collected by someone else.

In House: An In House contract is MasterVision’s term for any contract where you, the school, is manually collecting the payment in one way or another. This could be cash or credit card payments you have to submit.

With those terms out of the way, let’s look at the options you have to track contracts in MasterVision:

Billing Company Option #1

Your first option, if you have a “billing company”, is to completely ignore contracts in MasterVision. Don’t enter contracts and don’t worry about payments. You just let your billing company collect the money and rely on their reports. You don’t use MasterVision at all for this part of running your school.

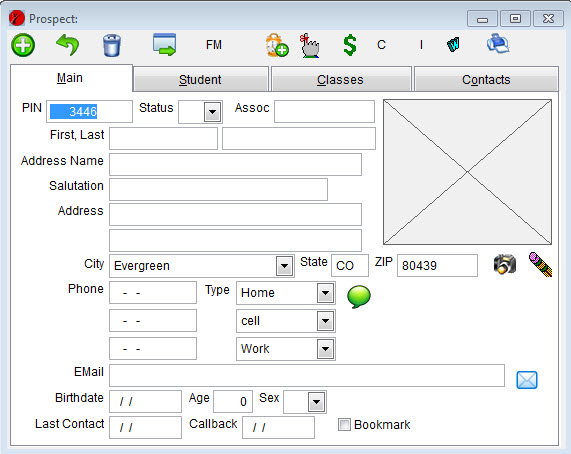
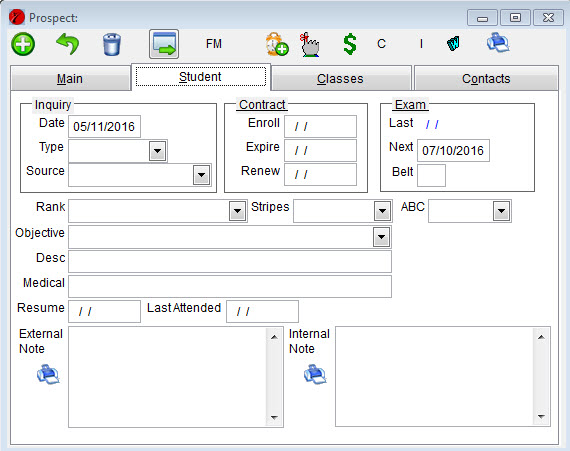
You can still use the Expire and Renew fields on the student form to know when a student’s contract is expiring and when you want to talk to them about renewal.

Billing Company Option #2

Option #2 for “billing company” contracts is to go ahead and use MasterVision contracts, but to tell MasterVision that the payments are collected by your billing company. MasterVision will know about the due payments, but will mark them as collected automatically with the end of day routine.

This is a little more work, but provides some benefits:

  • You have a double-check that the billing company is collecting what you think they should be by comparing to MasterVision reports
  • You can create custom contract documents in Microsoft Word. If you have to submit a form to the billing company, this is a quick & easy way to create that form.
  • The Renew and Expire dates on the student get set automatically
  • You can see in MasterVision what payments are coming up to better gauge your cash flow

In House Contracts

Your last option is to mark your contracts as “In House” – where you’ll be collecting all the payments yourself. You use the Contract part of MasterVision to create the contracts and the Point of Sale to record the payments you receive. MasterVision can create customer statements, aging reports, warn you of overdue payments, and everything else you need to handle contract payments manually.

In House Contracts – Stripe Credit Cards

One last option MasterVision has for you – you can collect credit card transactions with MasterVision working with the Stripe credit card service. You mark the contract as a Stripe contract, enter the credit card information, and then use a special screen in MasterVision to process the credit card payments each day (or week, or month) and collect the payments that way. This is explained in more detail here.

Or, Mix It All Up!

Lastly, you don’t have to choose just one method. MasterVision has the power and flexibility to work with all of those methods. You can have students that are billing company payments, other students that the bank is collecting an EFT, other students that are in house and bringing you a check each month, and still other students that are credit card payments. MasterVision can handle all of them, at the same time, without any trouble.

International Setup

By default, MasterVision is setup to use USA dates, addresses, and phone numbers. It’s easy to change this though so that MasterVision will work for countries outside the USA.

Select Tools > Options from the menu and go to the General tab. It looks like this:

OptionInternational

Date Format: Change this to “Short” to use the date format you have in Windows (DD/MM/YYYY)

Phone Format: Erase the “999-999-9999” leaving this blank. You’ll then be able to enter phone numbers however you like (up to 20 characters)

Address Format: “City, State ZIP” is the default. You can change this to be “ZIP City State”. This changes how an address appears on a label or report – it doesn’t change the screens.

That should do it. If there are any international options that I missed, please let me know. I can customize MasterVision to work the way you need.

Getting Started

Thanks for taking a look at MasterVision!

I know that trying out new software can be confusing. I’ve got several blog posts here that will walk you, step by step, through setting up MasterVision, entering your students, and starting to take attendance. Follow along and you’ll be up and running in no time!

Step #1: Install MasterVision

You should have gotten an email explaining how to download the MasterVision program and install it on your computer. If you haven’t done that yet, you’ll need to go do that first.

Step #2: Setup Items

To make entering data easier, there are a couple things you’ll want to setup first in MasterVision before getting to the more exciting stuff.

Step #3: Specifics About Your School

Now MasterVision needs to know a few things about your school.

Step #4: Start Entering Your Students

Congratulations! You’ve completed the setup items that needed to be done. You can now start entering your students.

Step #5: Attendance

Once all of your students are entered, you can start taking attendance.

Other Things

Now that you have the basics underway, here are some more topics you might be interested in:

  • Using the Find form to open Student records

Find Form

You use the Find form to open existing student records. To open the Find form, click the Find button (the binoculars) on the toolbar:
toolbar
The Find form looks like this:
Find
If you know a student’s PIN or Association ID, you can simply type that in and press the Find button (on this form, the  binoculars) and it will open that student for you.
You can also search for a student using the First and/or Last name boxes. Type in the first part of that name, click the Find button, and in the box you’ll get a list of every student that matches what you entered. Double-click a name in that list and MasterVision will open that student.
You don’t have to do both First and Last names and you also don’t have to enter a full name. Some examples:
  • You can enter just “A” in First name and it’ll find every student whose first name starts with A.
  • You can enter just “S” in Last name and it’ll find every student whose last name starts with S.
  • You can enter “A” in first name and “S” in last name and MasterVision will find all students who meet both of those criteria.

Attendance

Before you can start entering attendance, you have to enter your students and setup your class schedule. With that done, you can start taking attendance. On the toolbar, click the button “A” button to take class attendance. The toolbar looks like this:

toolbar

Clicking the A button opens the Attendance form:

Attendance

Date: Today’s date has already been entered, but you can change it if you need to.
Class: The classes available for this date are shown here. If something is wrong, you can add/edit to the class list at File > Open > Attendance > Classes.
Instructors: Select the employee that is teaching the class. Employees are setup at File > Open > Employees.
Next you have to select the students that are attending this class. There are several ways to do it:
Enrolled: The Enrolled list gives you a list of students that you indicated should be in this class. You can double-click a name in the list to move the student to the attending side (and double-clicking on the attending side will move them back). A student will appear in this list if you selected this class for them on the Student form, Classes tab.
PIN: The PIN section will let you type in a PIN number to add a student Attending section. If you don’t know the PIN numbers (and you probably don’t), you can double-click the underlined “PIN” label to open the Quick Find form:
FindStudent
On the Quick Find form, you can lookup a student by First or Last name (just type in a couple letters, you don’t have to do the full name, then press enter). A list of matching students will come up. Double-click on the student you want put that student in that class.
Warning Messages: You may get a warning message as you add a student to the attending list. MasterVision warns you if their is a situation where you might now want that student attending class (expired contract, hasn’t attended in two weeks, has money due, etc.). You can just OK those error messages for now.
When you’re all done with Attendance, click the green checkmark to show that you are done. The attendance screen will close and you’ll get the option on whether or not to print the instructor’s report.
You can now start taking attendance for all of your classes.

Entering Students

To add students, you go to the Find form. On the toolbar, click the binoculars button:
toolbar
That opens the Find form which looks like this:
Find
Most of the time you’d use the Find form to lookup a student. You’d enter something in first name or last name and click the Find button. But, we haven’t entered any students yet so nothing cool will happen if you try that.
To enter a new student, you click the Add button (the plus sign). That will open the student form that looks like this:
studentTab1
We’re ready to start entering our first student! There’s a lot of information there. If you don’t have some of that information, don’t worry about it. You can leave it blank for now and do it later. Here’ s some help on entering information on this first tab:
  • PIN: Is an ID number that MasterVision assigns automatically. I’d recommend you leave it alone.
  • Status: The Student form is used both for Students and Prospects. Since we are entering students, set the status to “A” for active student.
  • Assoc: Is for any association ID, if you have one. If you don’t, leave it blank.
  • Picture: That big X box is where a picture of a student would be shown. Let’s deal with pictures in a later email so don’t worry about it.
  • First, Last: I think you know what to do there
  • Salutation: The name that appears on a letter after the Dear —, part. If they have a nickname or something they prefer, you can enter that here.
  • Address: The full name you’d put on an envelope. MasterVision defaults in what you typed for first & last. You can get fancy and put a Mr. or Ms. on that if you want, or just leave it.
  • Address, City, State, Phone, Email, Birthday: If you have this information, great, go ahead and enter it. If not, leave it for now.
  • Last Contact, Callback, Bookmark: Ignore all of these for now.
Once you have the above information entered, click on the Student tab. You should see this:
StudentTab2
We’re not going to enter much on this tab. Ignore everything except the following:
  • Exam section, Next Exam: We want to enter a date here. Take your best guess at what the date would be for this student’s next exam.
  • Rank: Enter the student’s current rank
  • Stripes: If you do stripes, enter them here. You’ll have to right-click it to set up the stripes you use.
Everything else gets ignored for now. Click the Classes tab. You see this:
StudentTab3
We need to put the students in the classes he attends. Double-click the class in the “Classes” section to move them to the “Enrolled In” section. Put the student in every class they could potentially comes to. (If you put them in the wrong one, you can double-click in the Enrolled In section to move that class back to the Classes section).
Ignore the Groups and Intros at this point. We’ll also ignore the Contacts tab at this point. All of that you can come back to do later if you want.
That’s it, you’ve entered your first student! Congratulations! Click the X in the upper right of the student form to close the student. All of your information is saved automatically.
You’re now back on the Find form where you can click the Plus button again to add another student.

Class Schedule

MasterVision needs to know about your class schedule. You can open the Class form from the menu at File > Open > Attendance > Classes (or double-click the Setup Classes in the Getting Started window). It looks like this:
classes
Description: Is simply the name you give the class. It can be anything you want.
Day & Time: Are the day and time this class occurs.
Type: Is a list that you can setup to be whatever you want. It comes in handy later on when you’re running reports. To change this list, right-click it. You can then setup whatever types you want. But, Todd, you’re wondering “What types do I want?” Here are some ideas:
  • Maybe you have adult & child classes that you want to track separately? Setup a type of Adult and one of Child.
  • Maybe you have a Regular class and a Weapons class you want to track?
  • Perhaps you have multiple styles of martial arts and want to track them separately?
  • Maybe you just don’t care about that at all. That’s fine, leave it blank. You can always change it later if you want.

Next: Enter Students

Ranks

You’ll need to tell MasterVision about the rank structure you use in your school. You access the Rank form from the menu in MasterVision at File > Open > System Setup > Ranks (or double-click the Setup Ranks in the Getting Started form). It looks like this:

ranks

Name: Is just the name you want to give your rank.

Order: Is the numerical order this rank should be put in. So if White belt is your first rank, you put in a 1. If Yellow is your second rank, put in a 2. Simple enough. If you have multiple belt systems, just separate them numerically – for example: If you have kids’ belt and adult belts, the kids’ belts might be order 1-8 while the adult belts are order 10-22.

Lessons Required to Test for Next Rank: This is how many lessons a student has to take before he can take his next exam. If you set this, when you ask MasterVision who is ready to test, it can optionallyl exclude the people who have not had the required number of lessons. If you don’t care about this, just leave it at a 0.
Weeks until Next Test if Student: The next three entries determine when a student’s next exam will be when you’re recording the current exam. For example: if I’m currently a white belt and I pass my white belt exam making it to yellow, how many weeks will it be until I’m ready to take my yellow belt exam? Set this however your school does it. Maybe at the beginning, a student is ready for their next test in 4 weeks. Maybe at a higher rank, the next test wouldn’t be for 6 months (24 weeks). Quick explanation on the three fields:
  • Passes: If the student passes the current exam for this rank, when is their test for the next rank?
  • Fails: If the student fails the current exam, when would they retest for this rank?
  • No Show: If the student is a no show for the current exam, when would they retest for this rank? This might be the same as fails which is fine.

Cities

So that you can quickly enter an address, MasterVision will let you select a city from a list rather than typing in the same city names over and over. This works just like phone types does:
1. Double-click on the Setup Cities item in the Getting Started form (you can open the Getting Started from the menu at Tools > Getting Started).
2. Click the New button and enter your city name in the grid.
Maybe you’re in a small town and you’ll only have students from your city. That’s fine – you just enter that one city name here. Maybe you’re straddling a suburb in a big city and there are 4 or 5 different city names a student might have – that’s fine as well, just keep clicking New and enter them all here.
Next: Ranks

Phone Types

MasterVision allows you to have up to 3 phone numbers per student and each of these should have a “type” – home, work, etc. Rather than typing those names over and over, MasterVision let’s you enter them once and then just pick from a list.
1. From the Getting Started screen, double-click on Setup Phone Types. (You should see the Getting Started screen when you start MasterVision. If not, you can open it from the menu at Tools > Getting Started. Alternatively, on the student screen you can right-click the phone type field.)
2. This will open the phone setup screen that looks like this:
PhoneTypes
3. To add a New phone type, click the New button and then, in the grid, type in the phone type that you want. To enter more, click New again and enter in the grid. If you get one you don’t want (or a blank one), click on it in the grid and then click the Trashcan button to delete it.
Now, you’re probably asking yourself, “What phone types should I enter?” That’s up to you. Maybe you’ll want Home, Work, and Cell phone types. Maybe you’re never going to call someone at work, so you’ll just have Home and Mobile. It’s completely up to you how you want them to read.  (Don’t include a “Mom” or “Parent” phone type – you set those up in Contacts, which we’ll cover later.)
Whatever you decide, enter those and then click the X in the upper-right corner to close the form. Your changes are saved automatically.
Next: Cities