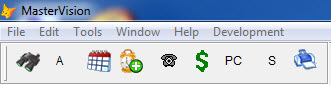
To add students, you go to the Find form. On the toolbar, click the binoculars button:
That opens the Find form which looks like this:
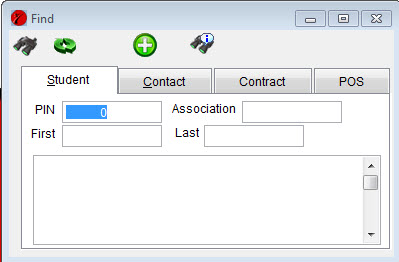
Most of the time you’d use the Find form to lookup a student. You’d enter something in first name or last name and click the Find button. But, we haven’t entered any students yet so nothing cool will happen if you try that.
To enter a new student, you click the Add button (the plus sign). That will open the student form that looks like this:
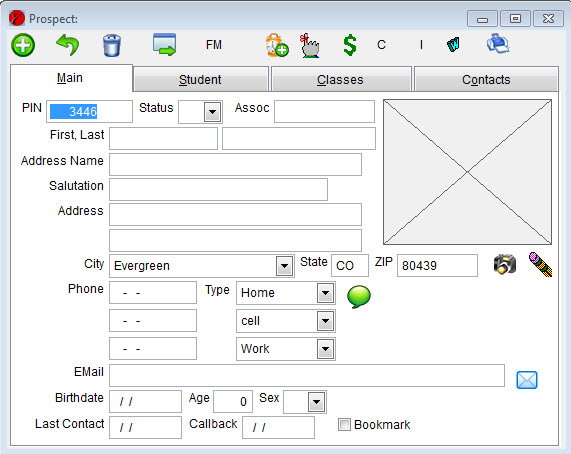
We’re ready to start entering our first student! There’s a lot of information there. If you don’t have some of that information, don’t worry about it. You can leave it blank for now and do it later. Here’ s some help on entering information on this first tab:
- PIN: Is an ID number that MasterVision assigns automatically. I’d recommend you leave it alone.
- Status: The Student form is used both for Students and Prospects. Since we are entering students, set the status to “A” for active student.
- Assoc: Is for any association ID, if you have one. If you don’t, leave it blank.
- Picture: That big X box is where a picture of a student would be shown. Let’s deal with pictures in a later email so don’t worry about it.
- First, Last: I think you know what to do there
- Salutation: The name that appears on a letter after the Dear —, part. If they have a nickname or something they prefer, you can enter that here.
- Address: The full name you’d put on an envelope. MasterVision defaults in what you typed for first & last. You can get fancy and put a Mr. or Ms. on that if you want, or just leave it.
- Address, City, State, Phone, Email, Birthday: If you have this information, great, go ahead and enter it. If not, leave it for now.
- Last Contact, Callback, Bookmark: Ignore all of these for now.
Once you have the above information entered, click on the Student tab. You should see this:
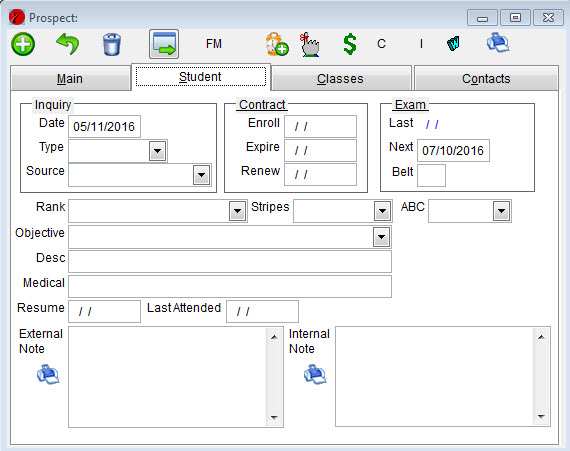
We’re not going to enter much on this tab. Ignore everything except the following:
- Exam section, Next Exam: We want to enter a date here. Take your best guess at what the date would be for this student’s next exam.
- Rank: Enter the student’s current rank
- Stripes: If you do stripes, enter them here. You’ll have to right-click it to set up the stripes you use.
Everything else gets ignored for now. Click the Classes tab. You see this:
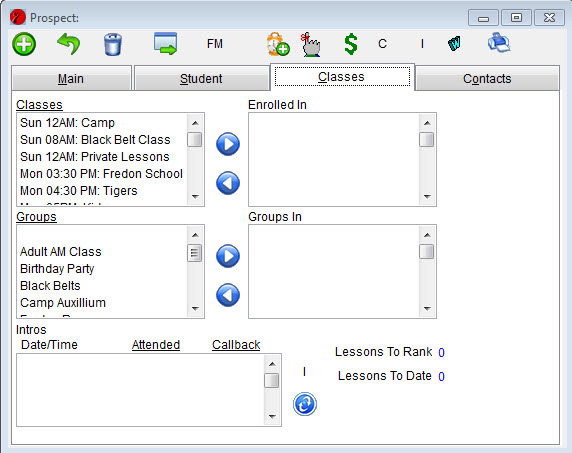
We need to put the students in the classes he attends. Double-click the class in the “Classes” section to move them to the “Enrolled In” section. Put the student in every class they could potentially comes to. (If you put them in the wrong one, you can double-click in the Enrolled In section to move that class back to the Classes section).
Ignore the Groups and Intros at this point. We’ll also ignore the Contacts tab at this point. All of that you can come back to do later if you want.
That’s it, you’ve entered your first student! Congratulations! Click the X in the upper right of the student form to close the student. All of your information is saved automatically.
You’re now back on the Find form where you can click the Plus button again to add another student.
Next: Taking Attendance
